Pouring new concrete over existing concrete is possible if the old surface is clean, stable, and free of major cracks or movement. Proper preparation, including cleaning, repairing damage, and applying a bonding agent, is essential for the new concrete to adhere correctly. When done right, this method can refresh the surface and extend the lifespan without full removal.
What Does Pouring Concrete Over Concrete Mean?
Pouring concrete over concrete means adding a new layer of concrete on top of an old slab. People call this an "overlay" or "resurfacing." It's a way to fix worn-out surfaces without tearing everything out.
You might do this for your driveway, patio, walkway, or garage floor. The new layer can be plain or decorative, and it can last 10 to 20 years when done right.
Why People Add New Concrete Over Old
There are good reasons to add a new layer instead of replacing everything. You don't pay for breaking up and hauling away old concrete, which saves thousands of dollars. The job gets done quicker since you skip the demo step. It covers stains, small cracks, and wear without full replacement. Sometimes you need to raise a surface to match doors or new landscaping. You can even add decorative stamped patterns or colors on top for a completely fresh look.
But this only works when your base is strong. Think of it like painting a wall—if the wall is crumbling, paint won't fix it.
When You Can Pour New Concrete Over Old
Not every concrete slab can handle a new layer. The old surface needs to be solid enough to support the weight and stay stable. Before you start any overlay project, you need to carefully check the condition of your existing concrete. A weak or damaged base will cause your new layer to fail quickly, wasting time and money.
Your Old Concrete Needs To Be
Your old concrete must be structurally sound with no sinking, settling, or major movement. If your slab rocks when you walk on it, that's a bad sign. It should be mostly crack-free—small hairline cracks are okay, but big cracks wider than a quarter inch or lots of spider web cracks mean the base isn't stable. Water shouldn't pool on the surface because that indicates drainage problems that will hurt the new layer too. Make sure no tree roots are growing underneath because they'll keep pushing and cracking. The surface should be level enough without major dips or high spots, since new concrete won't level out big problems on its own.
Good Candidates For Overlays
These situations work well for pouring concrete over concrete. Old concrete that just looks bad but feels solid is perfect for an overlay. Surfaces with minor surface cracks (not deep structural ones) can be covered successfully. Patios or walkways with stains or fading get a complete makeover. Driveways with small pits but no major damage are ideal candidates. Floors that need a fresh look but are structurally fine work great too.
When your existing slab still has good structural integrity, meaning it's safe and stable, overlays can give you years of additional life at a fraction of replacement cost.
When You Should NOT Pour Over Old Concrete
Some problems are too big for an overlay to fix. When your concrete has serious structural issues, adding a new layer is like putting a bandage on a broken bone. It won't work and you'll waste money. Here are the situations where you need to tear out the old concrete and start fresh instead of trying to overlay it.
Replace Instead If You Have
Some problems are too big for an overlay to fix. If your concrete has major cracks everywhere and looks like a broken windshield, something underneath is wrong and an overlay will crack just as fast. Tree roots growing below will keep pushing and breaking the concrete, so you must remove the roots and fix the base first. When one side of your slab sinks lower than the other, the ground underneath isn't stable and new concrete won't fix ground problems.
In cold areas, frost heave damage happens when water freezes under concrete and pushes it up every winter, which will destroy any overlay. If water sits on your concrete after rain, the drainage is bad and will rot the new layer from below. Adding 2 inches of new concrete might block doors, create trip hazards, or interfere with stairs, so sometimes the extra height just doesn't work. If the surface is flaking off or breaking apart when you touch it, the base is too weak to support anything new.
Proper base evaluation before starting prevents most overlay failures. Don't skip this critical inspection step.
Two Types Of Concrete Overlays
There are two main ways to pour concrete over concrete. Each works for different situations and has its own pros and cons. Understanding which type you need is important because choosing the wrong method can lead to failure. The right choice depends on your existing concrete's condition, how thick you want the new layer, and how you'll use the surface.
Bonded Overlays (With Glue)
A bonded overlay sticks directly to the old concrete using a special bonding agent. This acts like super-strong glue between the layers. It works best for thin layers between 1.5 to 2 inches, indoor floors, surfaces in good condition, and when you want the two layers to work together as one.
You'll need a bonding agent (special glue for concrete), rough surface texture so the glue sticks better, clean concrete with no dirt or oil or old sealers, and a stable base with no movement or major cracks. The bonding agent helps the new and old concrete act as one thick slab, which gives you more strength with less thickness.
Unbonded Overlays (Separate Layers)
An unbonded overlay uses a separator layer to keep the new and old concrete from sticking together. The layers stay separate and move independently. This works best for thicker layers of 4 inches or more, surfaces with minor problems, areas where movement might happen, and when you need extra strength.
You'll need separator material like plastic sheeting or felt, at least 4 inches of new concrete, possibly rebar or wire mesh for strength, and joints that line up with the old concrete. The separator lets each layer move a bit without cracking the other. This costs more because you need more concrete, but it works when bonding isn't possible.
How Thick Does New Concrete Need To Be?
Thickness matters a lot. Too thin and it cracks. Too thick and you waste money and create height problems. Getting the thickness right is one of the most important decisions you'll make. The minimum thickness depends on which type of overlay you choose and what you'll use the surface for.
Minimum Thickness Guide
For bonded overlays, you need 1.5 to 2 inches minimum. This works when using bonding agent on a very solid old surface, and it's best for cosmetic fixes. For unbonded overlays, you need 4 inches minimum, which works without bonding agent and provides independent strength. This approach is better for problem surfaces. For self-leveling overlays, you can go as thin as 1/8 inch, but this special thin-pour concrete only works for indoor floors and isn't strong enough for driveways.
Why does thickness matter so much? Concrete has small rocks in it called aggregate. These rocks can be 3/8 inch or bigger. You need enough concrete paste around these rocks to hold them in place. Too thin and the rocks stick out, making weak spots that crack.
Also, thicker concrete spreads weight better. When a car drives over 2 inches of concrete, the weight spreads out more than with just 1 inch. This prevents cracking under heavy loads.
What Affects Thickness
Several factors determine how thick your overlay needs to be. How you'll use the surface matters because driveways need more thickness than patios since cars are heavier than people. The amount of traffic affects thickness too, with high-traffic areas needing extra thickness to handle the wear. Weather conditions play a role since cold climates with freeze-thaw cycles need thicker concrete. Finally, the aggregate size in your mix matters because bigger rocks in your mix require more thickness to properly surround them.
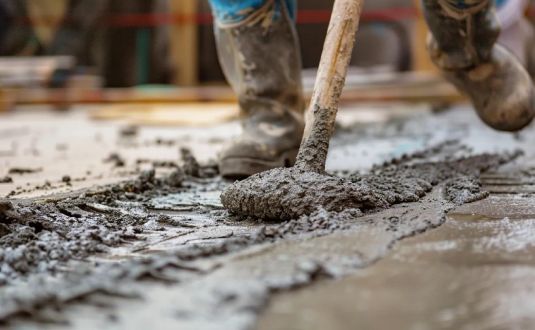
Step-By-Step: How To Pour Concrete Over Concrete
Here's exactly how to add new concrete over old. Skip any step and you risk failure. This process takes time and attention to detail, but doing it right means your overlay will last for decades. Each step builds on the previous one, so you can't cut corners or rush through any part of it.
Step 1: Check Your Old Concrete
Walk around and look at every inch. Take photos of problem spots. Ask yourself:
Are there cracks wider than 1/4 inch?
Does the surface rock or move when you walk?
Is water draining properly?
Do you see signs of tree roots or heaving?
Be honest here. If you're not sure, call a professional to inspect it.
Step 2: Clean The Surface Completely
This is crucial. New concrete won't stick to dirty concrete. You need to remove everything by sweeping away all dirt and leaves, pressure washing the entire surface, scrubbing out oil stains with degreaser, and letting it dry completely for 24 hours minimum.
Old sealers or coatings must come off. If the surface feels slippery or shiny, you might need to grind or acid etch it to expose fresh concrete.
Step 3: Fix Small Cracks And Holes
Small problems need fixing before you overlay. Fill hairline cracks with crack filler, patch holes with concrete patching compound, smooth out rough spots, and remove any loose or crumbling pieces.
Don't try to fix big cracks with filler. If cracks are big, you probably shouldn't overlay at all.
Step 4: Roughen The Surface
Smooth concrete won't hold new concrete well. You need texture. You can use a concrete grinder, try a scarifying machine, or apply acid etching for small areas.
The goal is to create a rough, sandpaper-like texture. This gives the bonding agent something to grip.
Step 5: Apply Bonding Agent (For Bonded Overlays)
If you're doing a bonded overlay, the bonding agent is your insurance policy. Don't skip it. Mix according to package directions, brush or roll it onto the old concrete, work in small sections because it dries fast, and pour new concrete while it's still tacky.
Most bonding agents stay workable for 30 minutes to 2 hours. Check your product instructions.
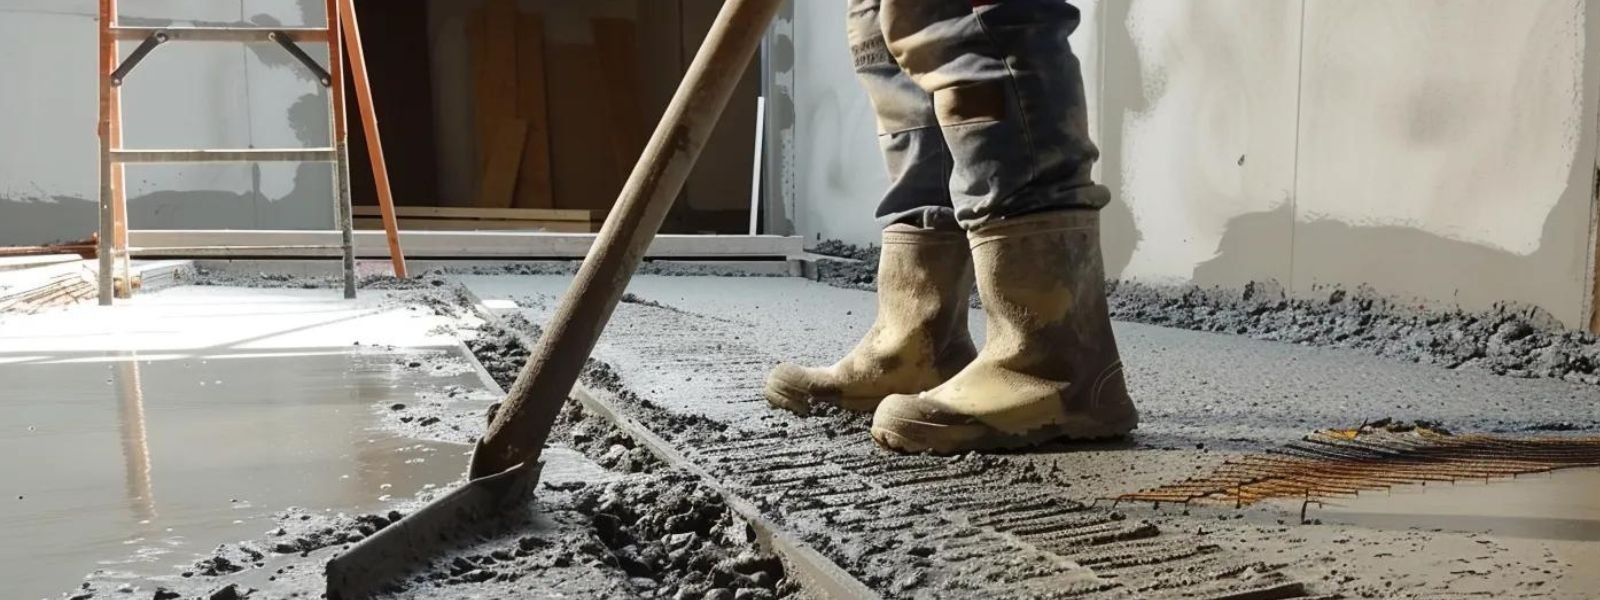
Step 6: Set Up Forms
Forms hold the wet concrete in place while it hardens. Use wood boards along edges, make them match your desired height, stake them firmly in place, and check that everything is level.
Forms should follow the shape and size of your existing slab.
Step 7: Add Reinforcement (If Needed)
For unbonded overlays or heavy-use areas, add strength with wire mesh that creates a grid to hold concrete together, rebar as metal bars for extra strength in big areas, or fiberglass as a modern option that's stronger and doesn't rust.
At Bulletproof Concrete, we use fiberglass-infused concrete that's 122% stronger than normal concrete. This often eliminates the need for traditional rebar.
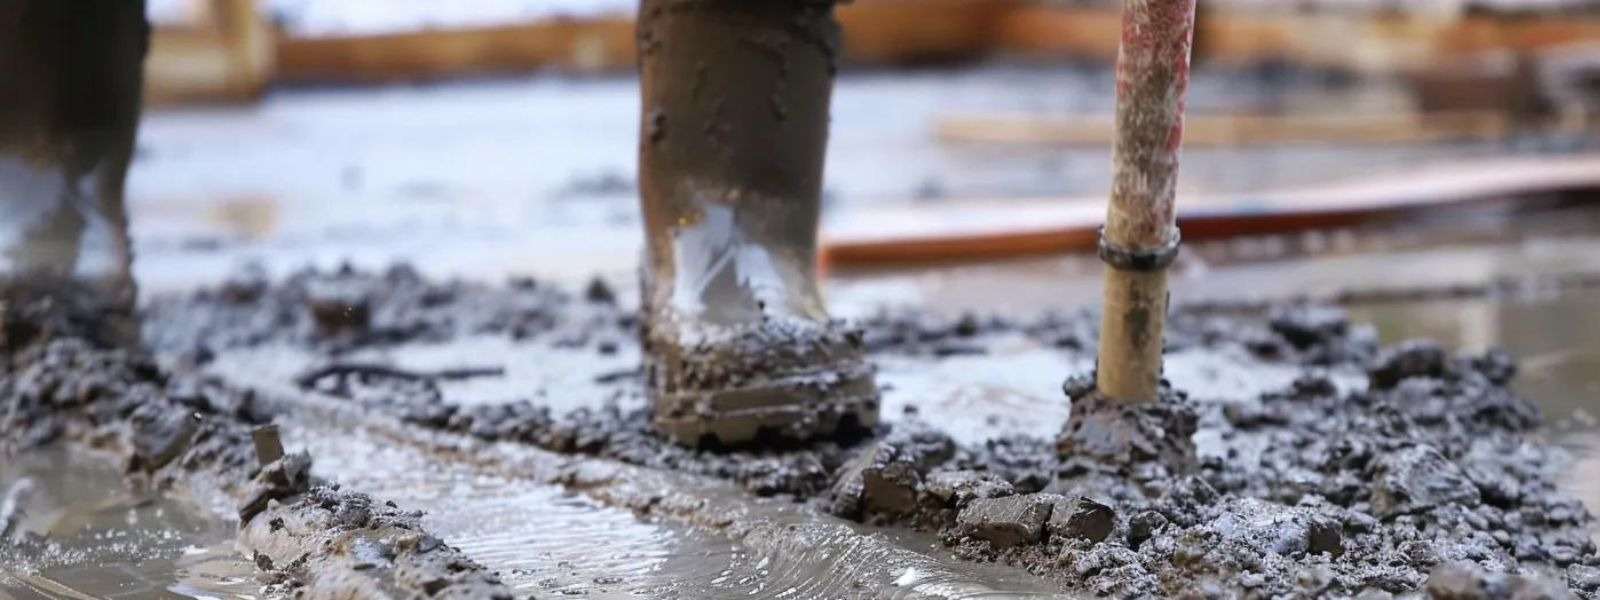
Step 8: Mix And Pour The Concrete
Time to pour. Work fast because concrete starts setting quickly. Follow mix ratios exactly, add water slowly because too much weakens concrete, and mix until smooth and consistent. When pouring, start at one end, work your way across, don't let concrete sit in the mixer too long, and pour in sections if the area is large.
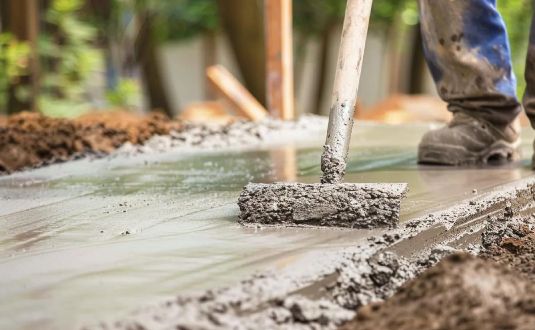
Step 9: Spread And Level
Once poured, you need to level it fast. Use a screed board (long straight board), drag it across the surface, fill low spots as you go, and remove excess from high spots.
Work quickly but carefully. You have limited time before it starts to set.
Step 10: Finish The Surface
The finish you apply now is what you'll see forever. For a smooth finish, use a steel trowel. For a slip-resistant surface, use a broom or brush. For stamped patterns like those on beautiful decorative patios, apply stamps while the concrete is still soft.
If you want decorative concrete, this is when you add texture and patterns.
Step 11: Let It Cure Properly
Curing is when concrete gets hard and strong. Rush this and you'll have weak concrete that cracks. Keep it moist for 3 to 7 days minimum, cover with plastic sheeting or burlap, don't let it dry out too fast, don't walk on it for at least 24 hours, and don't drive on it for 7 days minimum.
Hot weather makes concrete dry too fast. Cold weather makes it cure too slow. Both cause problems, so protect your new concrete from extreme temperatures.
Step 12: Seal The Surface (After 30 Days)
Once the concrete is fully cured, add a sealer for protection. Wait at least 30 days after pouring, choose a quality concrete sealer, apply according to directions, and reapply every 2-3 years.
Sealing protects against water, stains, and wear. It's especially important for driveways and other outdoor surfaces.
What Does A Concrete Overlay Cost?
Prices vary based on size, design, and your location. Here's what to expect in 2025. The cost of overlays depends on many factors, and understanding these can help you budget correctly. Simple overlays cost much less than complex decorative work, but even basic overlays deliver great value compared to full replacement.
Basic Overlay Costs
Plain overlays with simple, smooth finishes and one color and no special patterns cost $3 to $7 per square foot. Decorative overlays with colored concrete, basic textures, and simple designs cost $6 to $10 per square foot. Stamped concrete overlays with patterns that look like stone or brick, multiple colors, and custom designs cost $7 to $20 per square foot. Complex designs with intricate patterns, multiple colors, and hand-carved details cost $15 to $25 per square foot.
Real Project Examples
A 500 square foot patio would cost between $1,500 to $3,500 for basic overlay, $3,000 to $5,000 for decorative finishes, and $3,500 to $10,000 for stamped patterns.
What Affects The Price
Surface prep costs more when you have bad damage to fix. Location matters because prices are higher in big cities. Thickness affects cost since thicker overlays use more material. Design complexity impacts price because fancy patterns take more time. Access difficulty adds cost because hard-to-reach areas cost more to work on.
Always get 3 to 5 quotes before choosing a contractor. Prices can vary a lot.
Overlay Vs. Full Replacement: Which Costs Less?
Let's compare the real numbers. For overlays, you pay zero for demo since no removal is needed, $3 to $20 per square foot for new concrete, taking 2 to 3 days total, with a total cost for 500 square feet of $1,500 to $10,000. For full replacement, you pay $2 to $6 per square foot for demo and removal, $4 to $12 per square foot for new concrete, taking 5 to 7 days total, with a total cost for 500 square feet of $3,000 to $9,000 plus disposal fees.
Overlays save money upfront. But if your base is bad, you might pay twice—once for the overlay that fails, then again for full replacement. Do it right the first time.
Common Mistakes That Ruin Overlays
Learn from others' errors so you don't repeat them. Even experienced DIYers make mistakes with concrete overlays because the work is unforgiving. Once concrete sets, you can't undo errors. These are the most common mistakes that cause overlays to fail within months or even weeks of installation.
Mistake 1: Not Checking The Base
Many people skip the inspection and just start pouring. Then cracks appear in months because the base was unstable. The fix is to spend time inspecting by walking every inch, fixing problems first, or not overlaying if the base is bad.
Mistake 2: Skipping The Bonding Agent
Concrete doesn't naturally stick to concrete. Without bonding agent, the layers separate and crack. The fix is to always use bonding agent for bonded overlays and apply it right before pouring.
Mistake 3: Pouring Too Thin
Trying to save money by using less concrete just creates a weak layer that cracks immediately. The fix is to follow minimum thickness rules and don't go below 1.5 inches for bonded or 4 inches for unbonded overlays.
Mistake 4: Poor Surface Cleaning
Oil, dirt, and old sealers prevent bonding. The overlay might look good at first but will delaminate (separate) later. The fix is to clean thoroughly, use degreaser on oil stains, and pressure wash everything.
Mistake 5: Wrong Weather Conditions
Pouring in extreme heat or freezing temperatures ruins concrete. It either dries too fast or freezes before curing. The fix is to pour when temperatures are between 50°F and 85°F and avoid rain or extreme weather.
Mistake 6: Rushing The Cure Time
Walking or driving on new concrete too soon creates permanent damage. The fix is to wait at least 24 hours before walking, wait 7 days before driving, and keep it moist while curing.
Special Overlay Options For Different Surfaces
Different areas of your home need different approaches. What works for a driveway won't work for a patio. Each surface has unique requirements based on how you use it, how much weight it carries, and what weather conditions it faces. Here's what you need to know for each type of surface.
Driveways
Driveways take the most abuse from heavy vehicles, so they need at least 4 inches thick concrete with a high-strength mix. They should include reinforcement and benefit from a slip-resistant finish to prevent sliding when wet.
Patios
Patios focus more on looks and comfort. They can be thinner at just 2 inches, are great for decorative finishes, should have a slight slope for drainage, and are perfect for stamped patterns that mimic natural stone or brick.
Pool Decks
Pool areas need special attention for safety. They must be slip-resistant when wet to prevent accidents, should reflect heat so they don't get burning hot in summer, need proper drainage to avoid standing water, and can include cool deck coatings that keep the surface comfortable for bare feet.
Walkways And Sidewalks
Sidewalks need durability and safety. They should match surrounding height to avoid trip hazards, need expansion joints every few feet to allow for movement, require a slip-resistant surface for safety in wet conditions, and must meet local building codes and regulations.
Garage Floors
Garages have unique challenges since they take vehicle weight plus chemicals like oil and antifreeze. They need an oil-resistant coating, should have a slight slope to drain, and benefit from an epoxy sealer that makes cleaning easier and protects the surface.
How Long Does A Concrete Overlay Last?
With proper installation and care, you can expect a basic overlay to last 8 to 15 years, a stamped overlay to last 10 to 20 years, and high-quality decorative work to last 15 to 25 years.
What affects lifespan includes the quality of base concrete, thickness of overlay, climate and weather exposure, amount of traffic the surface gets, and how well you maintain and seal it over time.
Regular sealing every 2-3 years can double the life of your overlay. It's cheap insurance.
DIY Vs. Hiring A Professional
Can you do this yourself? Sometimes. But here's what to consider. Concrete work requires skill, experience, and the right tools. While DIY can save money on labor, mistakes cost far more to fix than hiring a pro from the start. Be honest about your abilities before deciding which route to take.
DIY Makes Sense When
DIY can work if you have concrete experience, the area is small (under 200 square feet), you want a plain and simple finish, you have all the right tools, and you have helper friends to assist with the heavy work.
Hire A Pro When
Hire a professional when the area is large, you want decorative or stamped finishes, your base has any problems, you've never worked with concrete before, or the result really matters to you and your home's value.
Concrete work is unforgiving. Mistakes are permanent and expensive to fix. Professionals have experience that prevents common errors.
At Bulletproof Concrete, we specialize in high-strength concrete overlays that last decades. Our fiberglass-infused concrete is 122% stronger than standard concrete and resists cracking far better than traditional methods.
Maintenance Tips For Long-Lasting Overlays
Once your overlay is done, protect your investment. In year 1, seal after 30 days, clean regularly with mild soap, and fix any small cracks immediately. In years 2-3, pressure wash annually, reseal the surface, and check for any damage.
For ongoing maintenance, clean up oil spills quickly, avoid using salt or chemicals that can damage concrete, fill cracks before they grow bigger, and reseal every 2-3 years to maintain protection.
Good maintenance can make your overlay last twice as long as neglected concrete.
What About Alternatives To Overlays?
If overlays don't work for your situation, consider these. Sometimes an overlay isn't the right solution, but that doesn't mean you're stuck with bad concrete. Several other options exist, each with its own advantages and ideal use cases. Understanding these alternatives helps you make the best choice for your specific situation.
Concrete Resurfacing
Similar to overlays but uses special thin-layer products. This involves very thin application of 1/8 to 1/4 inch, works for cosmetic fixes only, is not suitable for structural problems, and costs $3 to $7 per square foot.
Decorative Coatings
Epoxy or polyurethane coatings add protection and style. They're applied like thick paint, work great for garage floors, hide minor imperfections, and cost $4 to $10 per square foot.
Pavers Over Concrete
Installing pavers on top of concrete is another option. You don't need to remove old concrete, individual pavers are easy to repair, the result is more expensive than overlays, but it creates beautiful patterns and designs.
Complete Replacement
Sometimes starting fresh is the only option. It fixes all underlying problems, gives you 30+ years of life, costs more upfront, but takes longer to complete. When your concrete has serious issues, replacement is often the smartest long-term investment.
Questions To Ask Before Starting
Before you commit to an overlay, get clear answers. These questions help you avoid costly mistakes and make sure you're working with the right contractor. Don't be shy about asking detailed questions. A good contractor will answer them all honestly and help you understand exactly what you're getting.
Is My Existing Concrete Stable Enough?
Your contractor should inspect the slab thoroughly and tell you honestly if it can support an overlay. They should point out any cracks, settling, or other problems that could cause failure.
What Thickness Do I Need For My Situation?
The answer depends on whether you're doing bonded or unbonded overlay and how you'll use the surface. Driveways need more thickness than patios.
Should I Use Bonded Or Unbonded Overlay?
This depends on your base condition. Bonded works for solid bases, while unbonded is better when the base has minor issues.
What's Included In Your Price Quote?
Make sure the quote covers surface prep, materials, labor, cleanup, and any extras. Hidden costs cause problems later.
How Long Until I Can Use The Surface?
You can usually walk on it after 24 hours, but wait 7 days before driving on it. Full cure takes 28 days.
What's The Warranty On Your Work?
Good contractors stand behind their work with warranties covering cracking, delamination, and other defects for at least 1-2 years.
Do You Have Photos Of Similar Projects?
Ask to see past work that's similar to yours. This shows their experience and quality level.
What Maintenance Will I Need To Do?
You'll need to seal it every 2-3 years and keep it clean. Ask about specific products and schedules.
Final Thoughts
Pouring new concrete over existing concrete can save you thousands of dollars and give you a fresh, beautiful surface. But success depends on starting with a solid base and following every step correctly.
If your old concrete is stable with only minor problems, an overlay makes perfect sense. You'll get years of use at a fraction of replacement cost. Just make sure you prep the surface right, use the correct thickness, and let it cure properly.
But if your concrete has major cracks, sinking, or root damage, don't waste money on an overlay. Those problems will destroy the new layer quickly. In those cases, full replacement is the smarter long-term choice.
Still not sure if an overlay is right for your property? Contact us at Bulletproof Concrete for a free inspection and estimate. We serve homeowners throughout Huntsville, Madison, Decatur, and surrounding Alabama communities. Our fiberglass-infused concrete delivers superior strength and longevity compared to traditional concrete, giving you a surface that truly lasts.
Whether you need a new driveway, patio, walkway, or any other concrete work, we'll help you choose the right solution and do the job right the first time.
C30 concrete is about 20% stronger than C25, so it handles heavier loads and tougher conditions with less cracking. C25 works great for most Huntsville driveways, patios, and sidewalks, while C30 is better for foundations, retaining walls, RV parking areas, and high-stress slabs where Alabama clay soil and weather can cause shifting over time.
Glass fiber reinforced concrete offers major benefits like higher tensile strength, better crack control, lighter weight, and long-term durability. The fibers create internal reinforcement throughout the slab, helping concrete resist stress, shrinkage, and weather damage, making it ideal for driveways, patios, and outdoor projects in North Alabama.
Fiberglass improves concrete strength by adding tiny fibers that reduce cracking and help the slab hold together under stress. It boosts durability, impact resistance, and shrink control, making it a smart choice for driveways, patios, and high-traffic concrete in Alabama weather.
The cheapest ways to level a concrete slab are grinding (for small high spots) and mudjacking (for sunken slabs). Self-leveling compound is also affordable for shallow indoor dips, and polyurethane foam injection can be cost-effective for small areas where you want a longer-lasting lift.

.png)
.png)
.png)

.png)
.webp)

.webp)