What Happens When You Pour Concrete Over Existing Concrete?
January 12, 2026
3 Min
When you pour concrete over existing concrete, the new layer will only hold if the old surface is cleaned, roughened, and coated with a bonding agent. Without proper prep, the fresh concrete can crack, shift, or separate. When the base is solid and prepped correctly, pouring over existing concrete can create a strong, durable new surface.
Can You Really Pour Concrete Over Concrete?
Yes, but there's a catch. The cement in concrete doesn't have anything that makes it stick naturally. Think of it like trying to glue two dry pieces of paper together without actual glue. It just won't work.
When you pour fresh concrete over an old slab, the new layer will just sit on top as a separate piece. Over time, it'll crack, chip away, or even break off in chunks. That's why you need special products called bonding agents to make the two layers work together as one solid piece.
When This Method Works Best
Pouring concrete over concrete is a smart choice when your driveway or patio has minor surface damage but the base underneath is solid. It also works great when you want to raise the height by a few inches or need a fresh look without the big cost of full replacement.
The old concrete should have only small cracks (less than 1/4 inch wide) that you can fix first. Your existing slab needs to be level and shouldn't have settled or moved.
When You Should Skip It
Don't pour new concrete over old if you see big cracks that look like spider webs across the surface. Also skip this method if parts of the slab have sunk down or pushed up, tree roots are growing underneath, or water pools on the surface because of bad drainage.
If the concrete crumbles when you touch it, that's another red flag.
If your old concrete has these problems, they'll show up in the new layer too. You're better off removing everything and starting fresh with a new concrete driveway or patio.
Why Concrete Doesn't Stick To Itself
Here's something most people don't know: concrete is strong, but it's terrible at bonding. The cement paste in the mix doesn't contain any sticky stuff that would help it grab onto another surface.
When the first layer of concrete hardens, it creates a smooth, dense surface. Pouring fresh concrete on top of this smooth surface is like trying to stack building blocks on ice—they'll slide right off.
The Science Behind The Problem
Fresh concrete needs moisture to cure properly. When you pour it over dry, old concrete, the old surface sucks up all the water from the new mix. This leaves the new concrete weak and prone to cracking.
The old surface also has a layer of cement paste that rose to the top when it was poured. This layer is smooth and doesn't give the new concrete anything to grip onto.
Two Ways To Make Concrete Bond
You have two main options for making new concrete stick to old: bonded overlays and unbonded overlays. Each works differently and fits different situations.
Bonded Overlays
A bonded overlay uses special chemicals to glue the two layers together. This method works when your new layer will be thin (between 1.5 and 2 inches) and the old concrete is in great shape with no major cracks.
According to the Federal Highway Administration, bonded overlays between 2 and 5 inches thick are common for fixing concrete that's too thin but otherwise sound. You need to roughen up the old surface first use a grinder or scarifier to create texture as rough as 80-grit sandpaper.
Unbonded Overlays
An unbonded overlay uses a separator layer between old and new concrete. This lets each layer move on its own without pulling on the other.
Choose this method when your new layer will be thick (4 inches or more) or the old concrete has some minor problems like small cracks. You'll need to put down a layer of sand or special fabric between the two concrete layers.
How Thick Does The New Layer Need To Be?
This is super important. Go too thin and your concrete will crack and flake off. Go too thick and you might block doors or create trip hazards.
Minimum Thickness Requirements
For a bonded overlay, you need an absolute minimum of 1.5 inches, but 2 inches or more is a better choice. For an unbonded overlay, you need a minimum of 4 inches, with 7 to 9 inches being standard for driveways.
The reason for these minimums is simple. Concrete contains rocks (called aggregate) that are about 3/8 of an inch thick. You need enough concrete paste to cover these rocks completely on all sides.
Height Problems To Watch For
Adding even 2 inches of concrete changes the height of your surface. Doors that used to swing open freely might scrape or get stuck, and steps that were comfortable before might feel awkward or dangerous.
The transition from your new surface to other areas might create a tripping spot, and water might not drain away properly anymore. Measure everything carefully before you start.
What You Need: Tools And Materials
Getting the right stuff before you start makes the job much easier. Here's your shopping list:
Cleaning And Prep Tools
You'll need a pressure washer (you can rent one), stiff wire brush, concrete grinder or scarifier, and a shop vacuum for dust. Don't forget safety glasses and a dust mask.
Bonding Materials
Epoxy-based bonding agents work like super glue and are the strongest option. They're great for repairs and help seal cracks in old concrete.
Latex bonding agents look like milky white liquid and are easy to use for most home projects. You can apply them with a brush, roller, or trowel.
Concrete And Reinforcement
You'll need ready-mix concrete (or bags to mix yourself) and wire mesh or rebar (for unbonded overlays). Fiber additives are optional but helpful for preventing cracks, and concrete sealer protects your finished surface.
Step-By-Step: How To Pour Concrete Over Concrete
Follow these steps for the best results. Skip even one and you might have problems later.
Step 1: Check The Old Concrete
Look carefully at your existing surface. Walk around and check how big the cracks are (use a ruler to measure) and whether the slab rocks when you step on certain spots.
Check for any soft or crumbly areas and see if it has settled unevenly. Be honest with yourself if the problems are bad, this project won't fix them.
Step 2: Clean Everything Thoroughly
This step is huge. Dirt, oil, grease, and other junk will stop the bonding agent from working.
Start with a good pressure wash. Set the pressure high enough to blast away grime but not so high that it damages the concrete. Move in sweeping motions and don't stay in one spot too long.
For oil stains, you might need to chip away the stained concrete with a hammer and chisel. Oil soaks deep into concrete and won't just wash off. If you can't remove all the stained concrete, use a special sealer to cover it before you apply the bonding agent.
Let everything dry completely after washing. Depending on weather and humidity, this might take a full day or more.
Step 3: Fix Any Cracks
Small cracks need attention now. Use crack filler or patching compound to fill gaps smaller than 1/4 inch. For bigger cracks, you might need to cut them wider with a grinder, clean them out, and then fill them.
Let all repairs cure according to the product instructions before moving forward.
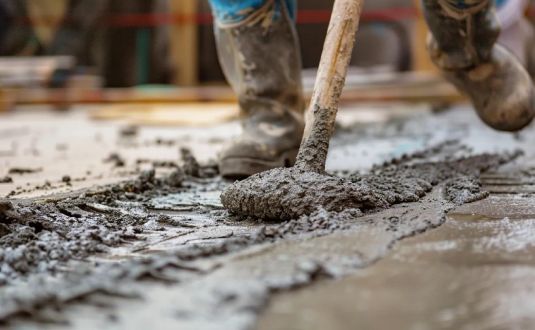
Step 4: Roughen The Surface
This is where the grinder or scarifier comes in. You want to remove that smooth top layer and create a rough, textured surface. The goal is to make the concrete look like coarse sandpaper.
If you don't have a grinder, you can use a stiff wire brush, but it's much harder work and won't be as effective. For larger projects, renting a scarifier is worth it.
Clean up all the dust when you're done. Use a shop vac to get it all—even small amounts of dust can weaken the bond.
Step 5: Apply The Bonding Agent
Read the instructions on your bonding agent carefully. Each product is slightly different.
Most bonding agents need to be mixed with water first. Use the exact ratio the manufacturer recommends. Mix thoroughly until you have a uniform consistency.
Apply the bonding agent with a brush, roller, or sprayer. Work it into the surface—don't just paint it on top. You want it to soak into all those rough spots you created.
The bonding agent needs to get tacky before you pour concrete. This usually takes 15 to 30 minutes, but check your product's instructions. It should feel slightly sticky when you touch it, not wet or dry.
Step 6: Set Up Your Forms
Forms are the boards that hold your concrete in place while it dries. They need to be strong and level.
Use stakes to hold the forms in position. Make sure they're at the exact height you want for your finished surface. Use a level to check—even a small tilt will show in the final product.
For unbonded overlays, lay down your separator layer (sand or fabric) before setting forms.
Step 7: Add Reinforcement If Needed
For bonded overlays under 3 inches thick, you might not need extra reinforcement. But for thicker pours or unbonded overlays, you'll want wire mesh or rebar.
Place wire mesh so it sits in the middle of your new concrete layer. For a 4-inch slab, that means 2 inches off the bottom. Use small blocks or chairs to hold it at the right height.
Rebar needs to be tied together in a grid pattern. The bars should cross each other at right angles, and you'll tie them together where they meet.
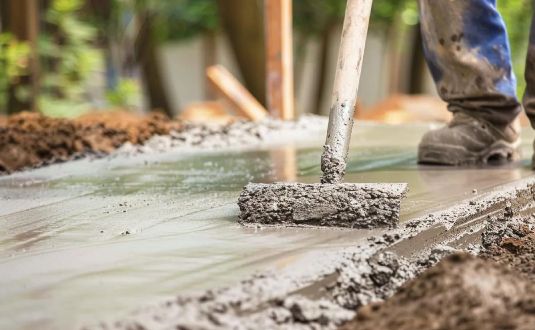
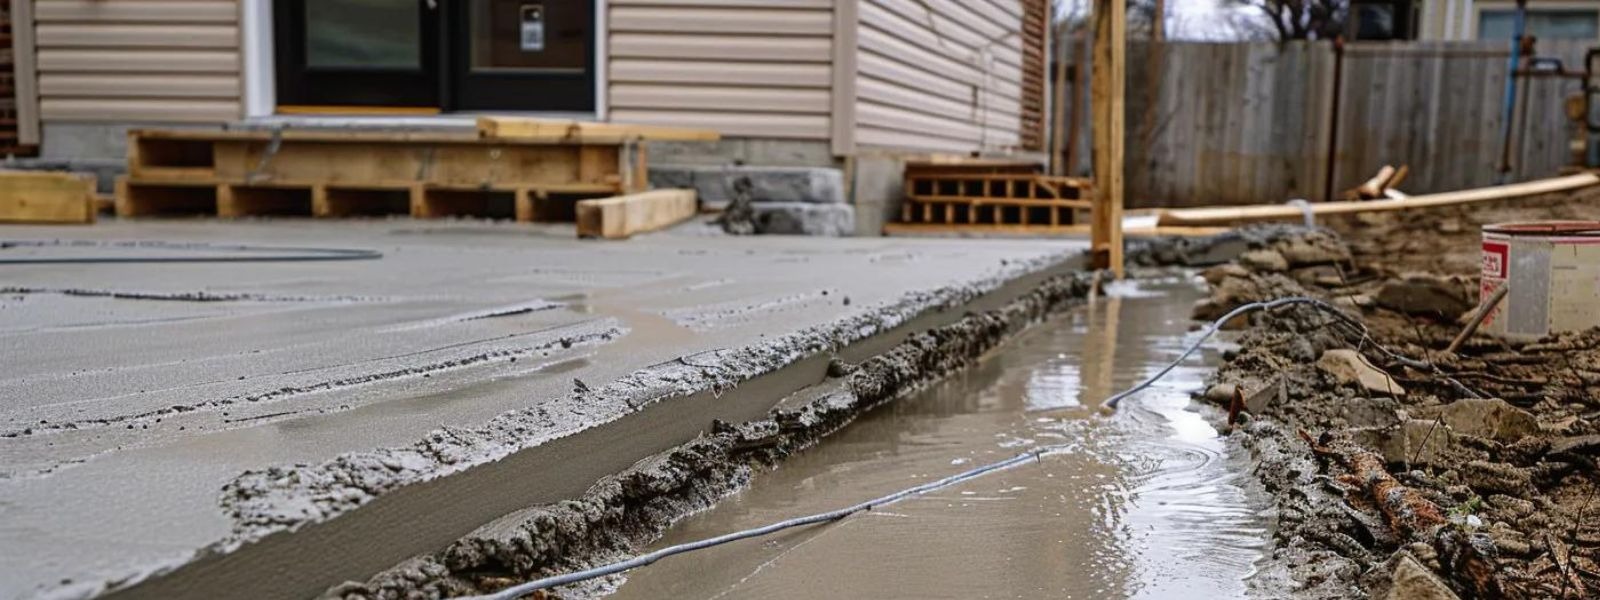
Step 8: Pour And Finish The Concrete
Here's where everything comes together. Mix your concrete according to instructions. If you're using bags, mix them with just enough water to get a thick, workable consistency—not soupy.
Pour the concrete while your bonding agent is still tacky. Start at one end and work your way across. Use a rake or shovel to spread it evenly.
Once it's poured, use a screed board to level the surface. Drag it across the top of your forms in a sawing motion. This takes out high spots and fills low spots.
After screeding, use a float to smooth the surface. For a regular finish, a wood float works fine. For a super smooth finish, use a steel trowel after the concrete starts to harden a bit.
Step 9: Cure The Concrete Properly
This is the most overlooked step, but it's critical. Concrete doesn't dry—it cures through a chemical reaction that needs moisture.
Keep your new concrete damp for at least 7 days by spraying it with water several times a day, covering it with plastic sheeting, or using a curing compound. Don't walk on it for at least 24 hours, and don't drive on it for at least 7 days.
Step 10: Seal The Surface
After the concrete is fully cured (usually 28 days), apply a concrete sealer. This protects against water, stains, and wear.
The American Concrete Institute recommends sealing all concrete surfaces, especially ones exposed to weather and traffic.
Common Mistakes That Ruin The Job
Even experienced people make these errors. Avoid them and you'll get better results.
Skipping Surface Preparation
This is the number one reason overlays fail. You might think the surface looks clean enough, but if there's any contamination, the bonding agent won't stick. Take the time to clean and roughen the surface properly.
Pouring Too Thin
A thin overlay might seem like it saves money on materials, but it'll crack and fail quickly. Always follow the minimum thickness guidelines. For bonded overlays, that's at least 1.5 inches (but 2 inches is better).
Not Using Bonding Agent
Some people think they can skip this step to save money. Big mistake. Without bonding agent, your new concrete is just sitting on top of the old layer with nothing holding it. It'll crack and break loose as soon as you use it.
Ignoring Weather Conditions
Temperature matters a lot when pouring concrete. If it's too cold (below 40°F), the concrete won't cure right and might freeze. If it's too hot (above 90°F), the water evaporates too fast and the concrete becomes weak.
Plan your project for mild weather spring and fall are usually best.
Forgetting About Drainage
If your old concrete had drainage problems, the new layer won't fix them. Water that pools on the surface will freeze in winter and cause cracks. Make sure your new surface slopes away from buildings at least 1/4 inch per foot.
How Long Does This Last?
A properly done concrete overlay should last 10 to 15 years or more. Several things affect how long it holds up: how well you prepared the surface, the quality of materials you used, your local weather (freeze-thaw cycles are hard on concrete), and how much traffic and use it gets.
Whether you sealed it and maintained it also makes a big difference. Compare this to a full replacement, which can last 20 to 30 years or more.
Cost Comparison: Overlay Vs. Replacement
Money matters when you're planning a project. Here's what you can expect to pay in 2025.
Concrete Overlay Costs
According to recent data from multiple industry sources, concrete overlays typically cost $3 to $7 per square foot for basic work, $6 to $10 per square foot for decorative styles, and $7 to $20 per square foot for stamped designs.
For a standard two-car driveway (about 400 square feet), you're looking at $1,200 to $2,800 for a basic overlay.
Full Replacement Costs
Tearing out old concrete and pouring new costs more. Basic replacement runs $6 to $15 per square foot, while decorative or stamped concrete costs $8 to $25 per square foot.
That same 400-square-foot driveway would cost $2,400 to $6,000 or more for complete replacement.
When Replacement Is Worth The Extra Cost
Sometimes spending more upfront saves money long-term. Replace instead of overlay when the old concrete has major structural problems or you've already repaired it multiple times.
If it's near the end of its expected lifespan anyway, or the cost of overlay is approaching half the cost of replacement, just replace it.
Special Considerations For Different Areas
Not all concrete surfaces are the same. Here's what to think about for specific projects.
Driveways
Driveways take the most punishment. They need to handle cars, trucks, and sometimes even delivery vehicles.
Use a minimum 2-inch bonded overlay or 4-inch unbonded overlay, and consider adding fiber reinforcement for extra strength. Make sure you have good drainage and seal the surface to protect against oil stains.
Patios
Patios see less heavy use than driveways, but they're visible, so looks matter more.
A thinner overlay (1.5 to 2 inches) often works fine, and decorative options like stamping or staining make sense. Make sure there's proper slope for water runoff and consider adding texture for slip resistance.
Sidewalks
Sidewalks need to be safe above all else. The Americans with Disabilities Act (ADA) has rules about surface smoothness and slope.
Keep height changes minimal to avoid trip hazards, and make sure slopes don't exceed ADA requirements. Use a smooth finish for wheelchairs and strollers, and watch for conflicts with existing curbs or steps.
Pool Decks
Pool decks need special attention because they're constantly exposed to water and pool chemicals. Texture is critical smooth concrete around water is dangerous.
Use concrete rated for pool chemicals and seal well to prevent water absorption. Consider a decorative overlay that includes texture.
Better Options To Consider
Sometimes there are easier, cheaper, or better ways to fix your concrete than pouring a new layer.
Concrete Resurfacing
This is different from a full overlay. Resurfacing uses a thin coat (1/32 to 1/4 inch) of special material. It's good for hiding minor imperfections, covering stains, creating a fresh look, and adding color or texture.
Resurfacing costs less than a full overlay ($2 to $5 per square foot) but doesn't add strength. It's purely cosmetic.
Concrete Staining
If your concrete is in good shape but just looks dull or faded, staining might be perfect. Acid stains or water-based stains can completely change the look without adding height or requiring extensive prep work.
Staining costs $2 to $4 per square foot and can last years if sealed properly.
Patching
For small areas of damage, simple patching makes more sense than an entire overlay. Use concrete patching compound for small cracks, chips and divots, corner damage, and isolated problem spots.
Patching is cheap (under $100 for most small jobs) and quick.
DIY Or Hire A Pro?
This is a big decision. Pouring concrete isn't rocket science, but it's physically hard work and mistakes are expensive.
When DIY Makes Sense
Consider doing it yourself if your project is small (under 200 square feet) and you have some concrete experience. You'll also need friends who can help (concrete work is tough alone) and time to do it right with no rushing.
You should be comfortable with physical labor. Concrete is heavy and the work is demanding.
When To Hire A Professional
Call in the experts when your project is large or you need it done right the first time. Also hire pros if the old concrete has problems you're not sure how to fix or you want decorative features like stamping.
Local codes may require permits and inspections, which professionals handle easily.
A professional concrete contractor brings experience, proper equipment, and usually a warranty on their work. They can spot problems you might miss and know how to handle complications that come up.
If you're in the Huntsville, Alabama area, consider reaching out to local experts who understand the specific challenges of our climate and soil conditions.
Frequently Asked Questions
Can I Pour Concrete Over Painted Concrete?
No, not without removing the paint first. Paint creates a barrier that prevents the bonding agent from sticking. You'll need to grind off the paint or use a chemical stripper to remove it completely.
How Soon Can I Walk On New Concrete?
Wait at least 24 hours before walking on it. For driving on it, wait a full week. For heavy loads, wait 28 days for full strength.
What Happens If It Rains During Curing?
Light rain on fully set concrete is actually helpful it provides moisture for curing. But heavy rain within the first few hours can damage the surface. If rain is in the forecast, cover your fresh concrete with plastic.
Can I Pour Concrete Over Cracked Concrete?
You can, but only if you fix the cracks first and the underlying problem is solved. If the cracks came from settling or tree roots, they'll just come back in your new layer.
Do I Need A Permit?
This depends on your local building codes. Many areas require permits for significant concrete work. Check with your city or county building department before starting. Working without a required permit can lead to fines and might cause problems when you sell your house.
What's Better: Fiberglass Or Rebar?
Both work, but they're different. Traditional rebar is stronger and better for heavily used areas. Fiberglass-reinforced concrete is lighter, won't rust, and can be easier to work with. For most home projects, either option works fine.
Final Thoughts
Pouring concrete over existing concrete can be a smart, money-saving choice but only when done right. Check your old concrete carefully before starting, and clean and roughen the surface thoroughly.
Always use a bonding agent for bonded overlays and follow minimum thickness requirements (at least 1.5 inches for bonded, 4 inches for unbonded). Take weather and curing seriously, and consider hiring a pro for large or complex projects.
When the existing concrete is in decent shape, an overlay can give you many more years of use at a fraction of the cost of complete replacement. But if your old slab has serious problems big cracks, settling, or heaving save yourself the trouble and replace it properly.
Need expert help with your concrete project? Whether you need a new driveway, patio, or sidewalk in the Huntsville, Alabama area, professional contractors can help you make the right choice for your situation. Don't hesitate to get quotes from multiple providers and ask questions about their experience with concrete overlays.
C30 concrete is about 20% stronger than C25, so it handles heavier loads and tougher conditions with less cracking. C25 works great for most Huntsville driveways, patios, and sidewalks, while C30 is better for foundations, retaining walls, RV parking areas, and high-stress slabs where Alabama clay soil and weather can cause shifting over time.
Glass fiber reinforced concrete offers major benefits like higher tensile strength, better crack control, lighter weight, and long-term durability. The fibers create internal reinforcement throughout the slab, helping concrete resist stress, shrinkage, and weather damage, making it ideal for driveways, patios, and outdoor projects in North Alabama.
Fiberglass improves concrete strength by adding tiny fibers that reduce cracking and help the slab hold together under stress. It boosts durability, impact resistance, and shrink control, making it a smart choice for driveways, patios, and high-traffic concrete in Alabama weather.
The cheapest ways to level a concrete slab are grinding (for small high spots) and mudjacking (for sunken slabs). Self-leveling compound is also affordable for shallow indoor dips, and polyurethane foam injection can be cost-effective for small areas where you want a longer-lasting lift.

.png)
.png)
.png)

.png)

.webp)

.webp)